How to Install Magento 2 Extension – Step by Step for Beginners
An extension is one of the preferable technique to add new features to Magento Store. Using Extension you can add new features such as slider, popup, mega menu, etc. After installing Magento 2, the first thing every developer needs to learn is how to install Magento 2 extension. In this step by step guide, we will show you how to install Magento 2 Extension.
How to Install Magento 2 Extension
There are three methods to installing a Magento 2 Extension. We have covered all three methods: Installing Magento 2 Extension using Web Setup Wizard, manually installing a Magento 2 Extension using FTP, and installing Magento 2 Extension using composer.
1. Install Magento 2 Extension using Web Setup Wizard (Deprecated and Removed in Magento 2.4)
The easiest way of installing a Magento 2 Extension is to use Web Setup Wizard. To install an extension using this method, you first need to purchase Magento 2 Extension from Magento 2 Marketplace. You can purchase the free or paid extension from Magento 2 Marketplace. Once you purchased the extension you can follow below steps to install that extension.
First thing you need to do is log in to your Magento 2 admin panel and navigate to System > Tools > Web Setup Wizard from admin sidebar. You will see a screen like the one in the screenshot below.
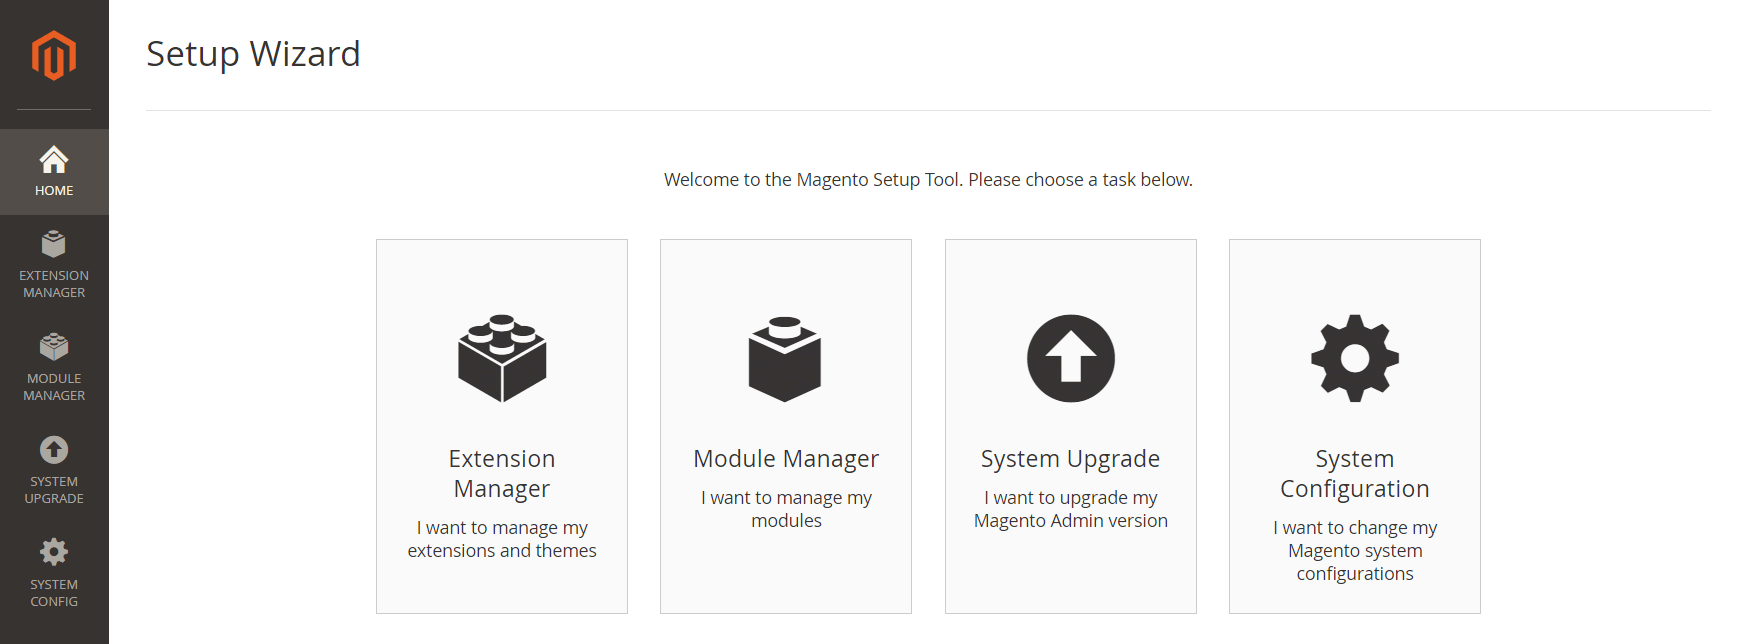
Click on the ‘Extension Manager’ task. After that, you will see a screen like one in the screenshot below. You need to enter Public Key and Private Key.
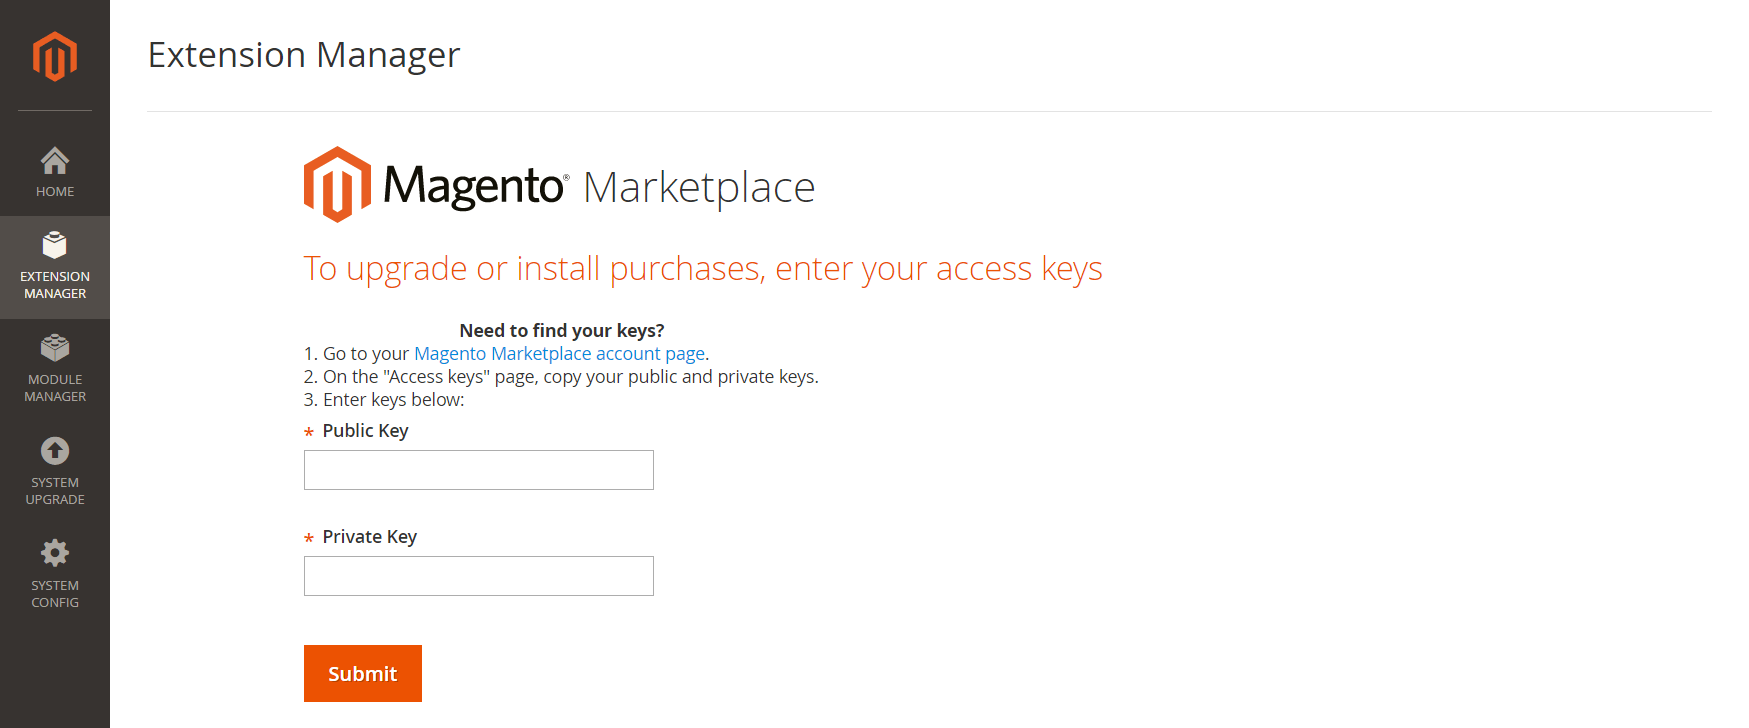
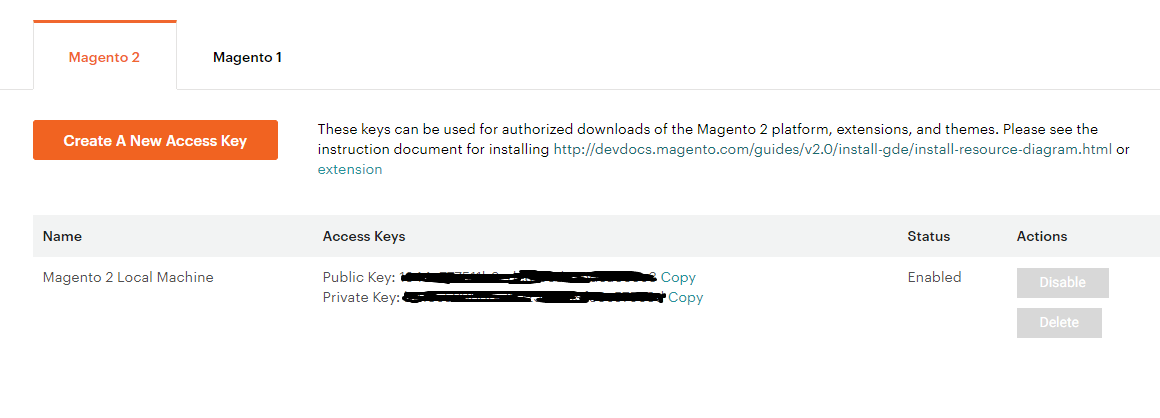
You will get your Public Key and Private Key from Magento Marketplace. Login to Magento 2 Marketplace, go to My Profile page, locate the keys from Access Keys page. Enter the Public and Private key and click on the submit button.
After some time, it will generate the list of all available updates, ready to install Extension and already installed Extension.
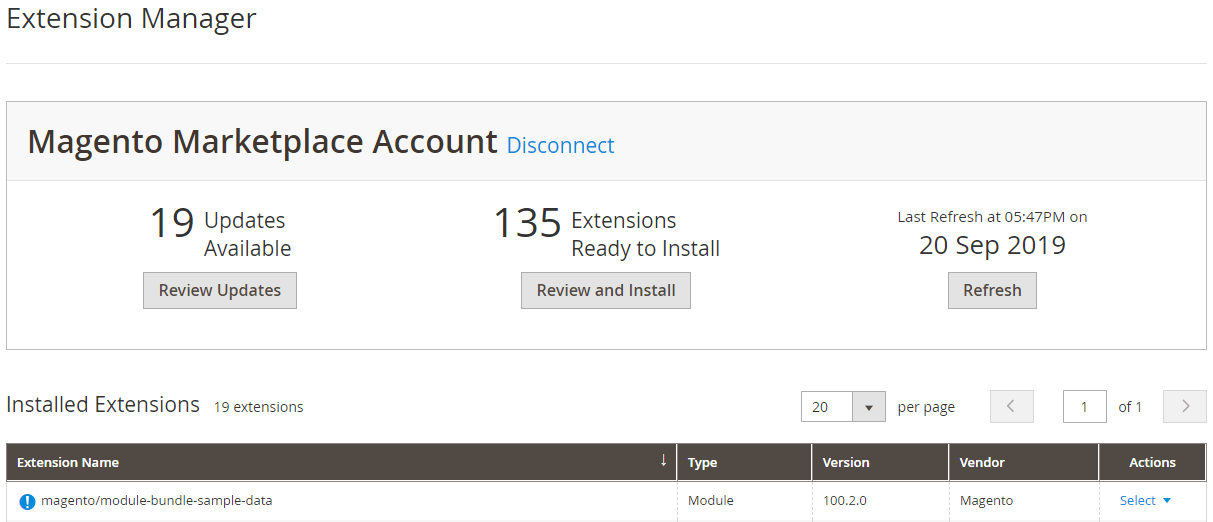
Click on ‘Review and Install’ button to see list of all available extension. you can see your purchased module also in that list.
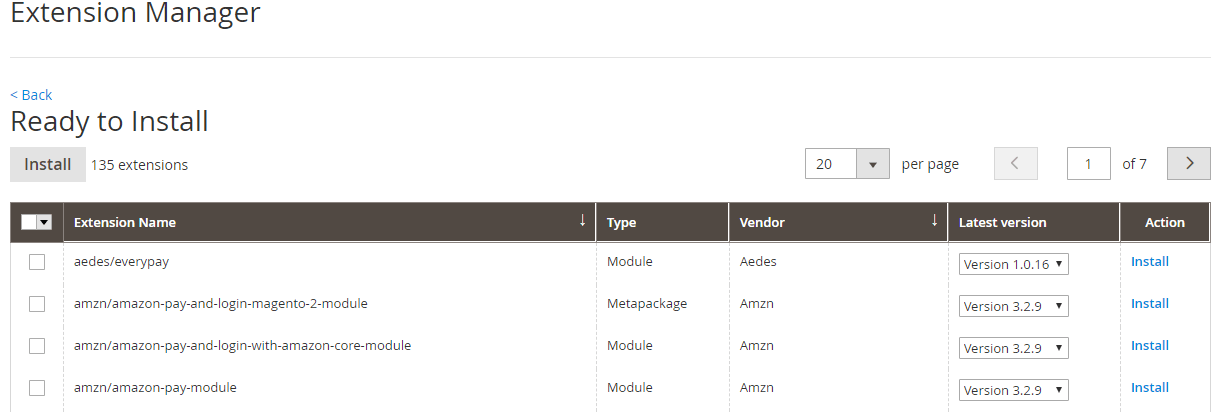
Select the latest version from Latest Version drop-down on the right side of the list and click on the install button. In the next screen, it will ask you for the Readiness Check. Click on ‘Start Readiness Check’ to check whether the extension you are installing is compatible with your Magento 2 server configuration or not.

If the readiness check completes successfully without any error, it will allow you to proceed ahead. If something went wrong it will not allow you to proceed ahead and you will be stuck at that point. In that case, you need to go with another method of installing Magento 2 Extension. If everything goes well then Click Next Button. In this screen, it will ask you to create a backup for a safe side.
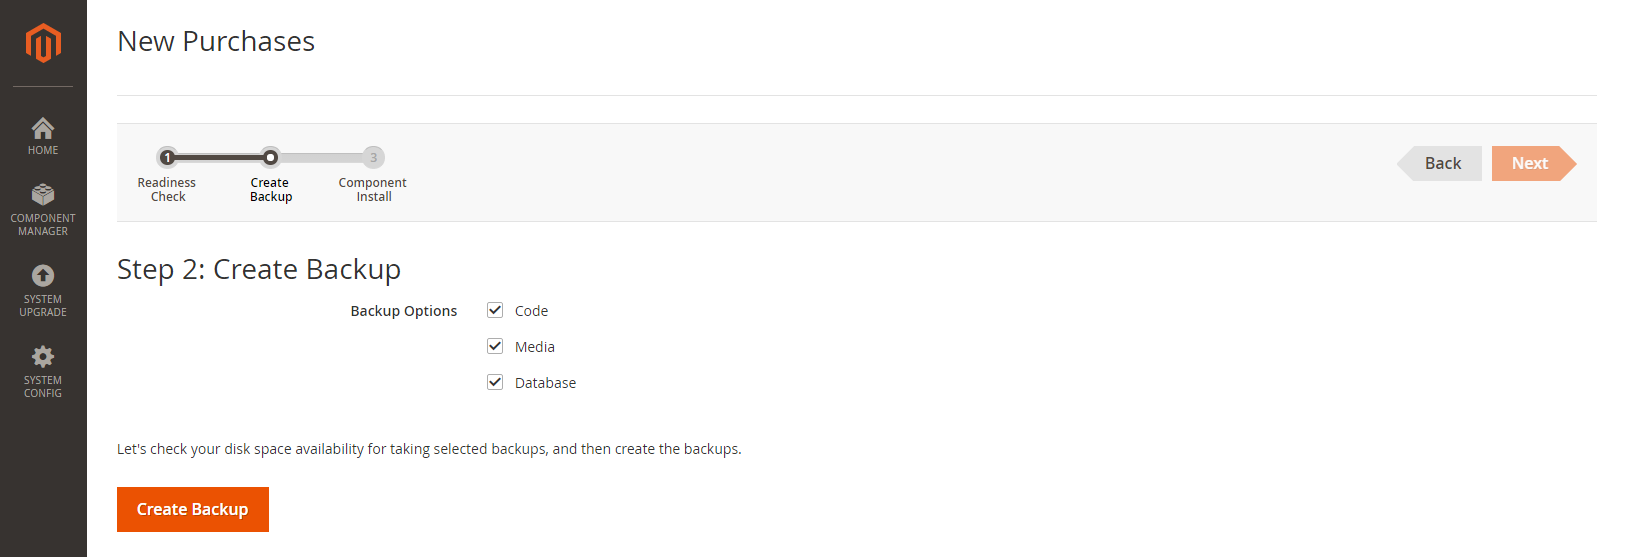
No need to take a backup of code and media because while installing an extension it is never affected. Only the database is affected when you install an extension. Checked the Database option and click on ‘Create Backup’ button.
After the backup process completes, click on Next button. In this screen finally, you will see the button to install the extension. When you are ready click on the ‘Install’ button. Based on the extension size, it will take some time to finish installing process. Once extension installed it will show you the success screen.
After that click ‘Back to Setup tool’, Then click System Configuration from the left sidebar. Click Reset link to logout. Login again into your Magento 2 admin panel. Go to System > Cache Management and clean the cache.
That’s all you have successfully installed Magento 2 extension. Next step is to configure your extension. An extension configuration varies for each extension. You can refer the extension guide to configure the extension.
2. Manually Install Magento 2 Extension using FTP
Sometimes due defer server configuration or bad permission, you are not able to install the extension using the setup wizard. In this situation, you do not need to worry. You can always install the Magento 2 Extension manually from FTP. This method is not recommended for beginner or merchants because if you make any mistake, it leads to a dead site.
First, you will need to download the extension zip from Magento 2 Marketplace. After that, you need to extract that zip.
Now navigate to your Magento 2 root directory on the server using FTP. Go to app > code directory. Now open the composer.json file from extracted files. In the first line, you will find the name of the module in a pattern like ‘codextblog/wbtab’
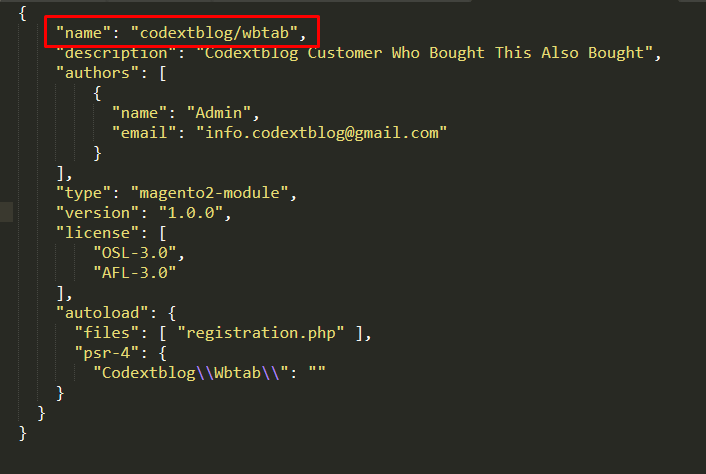
This name contains two words. Create the First directory with name same as the first word but make first letter capital. In my case, I need to create a directory ‘Codextblog’. Now enter into that directory and create another directory with the name same as the second word with first letter capital. In my case, I need to create ‘Wbtab’. so in the end, you must be landed on path app/code/Codextblog/Wbtab on your FTP manager.
Next, upload all the files you extracted from downloaded zip into this path.
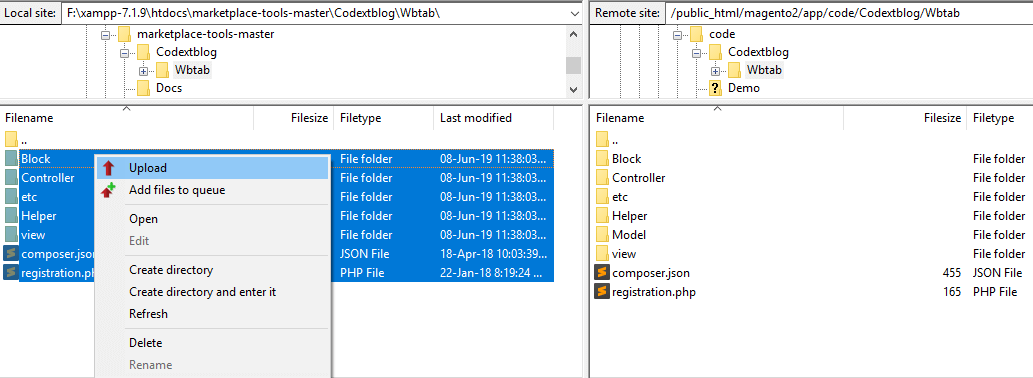
After uploading extension files, you need to run some commands to enable your extension. Next, connect to your server using SSH and navigate to the root of your Magento 2 installation directory. Run the below four commands in sequence.
php bin/magento setup:upgrade
php bin/magento setup:di:compile
php bin/magento setup:static-content:deploy
php bin/magento cache:flush
If the above four commands run successfully, that means your extension is installed on your site. Go to your Magento 2 admin panel and check the extension.
3. Install Magento 2 Extension using composer
To install Magento 2 Extension using composer, you first need to download and install the composer in your server. Most of the Magento 2 hosting provider already have installed composer.
To check whether the composer is installed or not, go to your Magento 2 installation root directory and run command composer –version. If the composer is installed, it will show you the composer version. If the composer is not installed it will show your error something like ‘composer: command not found’.
To install Magento 2 extension using composer we need to build below command
composer require component-name:version
Here you need to replace ‘component-name’ and ‘version’ with an actual name. To get component name and version, login into Magento 2 Marketplace. Go to My Profile section from the upper right corner.

Under the Marketplace tab, Click on the ‘My Purchases’
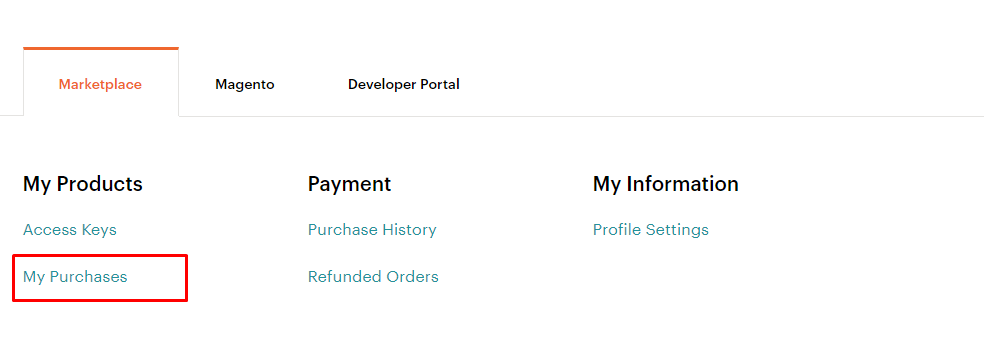
On the My Purchases page, you will see a list of all your purchased extension. Click on ‘Technical details’ for the extension you want to install.
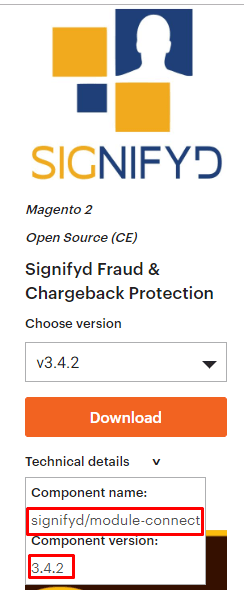
Copy component name and component version and paste that into composer command. In my case composer command will look like
composer require signifyd/module-connect:3.4.2
Once you run this command, it will ask you to enter the username and password. You can get the username (public key) and password (private key) from Magento 2 Marketplace Access Key page. Enter that keys and run the command. Magento 2 will update the composer.json file and downloading the extension. Now run below commands in sequence to complete the installation process.
php bin/magento setup:upgrade
php bin/magento setup:di:compile
php bin/magento setup:static-content:deploy
php bin/magento cache:flush
If the above commands run successfully, that means your extension is installed on your site. Go to your Magento 2 admin panel and check the extension.
Note: If you buy an extension from the third party website, make sure they provide composer installation. Because some of the third party extension providers do not support Magento 2 extension installation using composer.
Hope this article helped you learn how to Install Magento 2 extension. If you facing any trouble while installing Magento 2 extension you can always order our professional Magento 2 Extension installation service for only $5. Our Magento 2 professional will install the extension into your store without breaking existing functionality.
To receive update about DIY Magento 2 tutorials, please like us on Facebook and follow us on Twitter.


